Installing a hose nipple in a hose assembly is a fundamental process that can significantly impact the performance and longevity of the entire setup. As a professional Hose Assembly supplier, I've witnessed firsthand how a proper installation can prevent leaks, ensure efficient fluid or gas transfer, and enhance overall system reliability. In this blog, I'll guide you through the step-by-step process of installing a hose nipple in a hose assembly, providing you with the knowledge and confidence to tackle this task effectively.
Understanding the Basics of Hose Nipples and Hose Assemblies
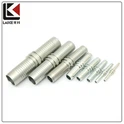
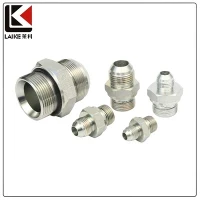
Before we dive into the installation process, let's take a moment to understand what hose nipples and hose assemblies are. A hose nipple is a short piece of pipe with male threads on one or both ends. It is used to connect hoses to other components such as valves, pumps, or fittings. Hose assemblies, on the other hand, are pre-assembled units that consist of a hose, fittings, and sometimes additional components like clamps or adapters. They are designed to provide a complete solution for fluid or gas transfer applications.
There are various types of hose nipples available, each designed for specific applications. Some common types include straight nipples, elbow nipples, and reducing nipples. Straight nipples are the most basic type and are used for simple connections in a straight line. Elbow nipples, as the name suggests, have a bend in them and are used to change the direction of the hose. Reducing nipples are used to connect hoses of different sizes.


Tools and Materials Needed
To install a hose nipple in a hose assembly, you'll need the following tools and materials:
- Hose Nipple: Choose the appropriate type and size of hose nipple for your application. Make sure the threads are compatible with the fittings on the hose and the other components.
- Hose: Select a hose that is suitable for the fluid or gas you'll be transferring. Consider factors such as pressure rating, temperature range, and chemical compatibility.
- Fittings: You'll need fittings to connect the hose nipple to the hose and the other components. Make sure the fittings are compatible with the hose and the hose nipple.
- Wrenches: A pair of wrenches will be needed to tighten the fittings. Choose wrenches that are the appropriate size for the fittings.
- Teflon Tape: Teflon tape is used to seal the threads of the hose nipple and the fittings. It helps prevent leaks and ensures a tight connection.
- Safety Equipment: Wear safety glasses and gloves to protect yourself from any potential hazards.
Step-by-Step Installation Process
Step 1: Prepare the Hose and Fittings
- Start by cutting the hose to the desired length using a sharp utility knife or a hose cutter. Make sure the cut is clean and straight.
- Remove any burrs or rough edges from the cut end of the hose using a file or sandpaper. This will ensure a proper seal between the hose and the fitting.
- If the hose has a protective cover, remove it from the end of the hose where the fitting will be installed.
Step 2: Apply Teflon Tape to the Hose Nipple
- Wrap Teflon tape around the male threads of the hose nipple in a clockwise direction. Make sure to apply at least 3-4 layers of tape.
- The Teflon tape will help create a seal between the threads of the hose nipple and the fitting, preventing leaks.
Step 3: Connect the Hose Nipple to the Fitting
- Insert the threaded end of the hose nipple into the fitting. Use a wrench to tighten the connection. Make sure not to overtighten, as this can damage the threads.
- A good rule of thumb is to tighten the connection until it is snug, and then give it an additional 1/4 to 1/2 turn.
Step 4: Attach the Fitting to the Hose
- Slide the fitting onto the end of the hose. Make sure the fitting is fully seated on the hose.
- Use a hose clamp or a crimping tool to secure the fitting to the hose. If using a hose clamp, tighten it using a screwdriver or a wrench. If using a crimping tool, follow the manufacturer's instructions to crimp the fitting onto the hose.
Step 5: Connect the Hose Assembly to the System
- Once the hose assembly is complete, connect it to the system. Make sure the connections are tight and secure.
- If necessary, use additional fittings or adapters to connect the hose assembly to the other components of the system.
Testing the Installation
After installing the hose nipple in the hose assembly, it's important to test the installation to ensure there are no leaks. Here's how you can do it:
- Pressurize the system slowly and check for any signs of leaks. Look for bubbles, drips, or hissing sounds.
- If you find a leak, turn off the pressure and tighten the connections. If the leak persists, you may need to replace the fitting or the hose nipple.
- Once you're satisfied that there are no leaks, you can continue using the hose assembly in your system.
Tips and Best Practices
Here are some tips and best practices to keep in mind when installing a hose nipple in a hose assembly:
- Choose the Right Components: Make sure to choose the right hose nipple, hose, and fittings for your application. Consider factors such as pressure rating, temperature range, and chemical compatibility.
- Follow the Manufacturer's Instructions: Always follow the manufacturer's instructions when installing the hose nipple and the fittings. This will ensure a proper installation and prevent any potential issues.
- Inspect the Components Regularly: Regularly inspect the hose nipple, hose, and fittings for any signs of wear, damage, or leaks. Replace any damaged components immediately.
- Use the Right Tools: Use the right tools for the job. Using the wrong tools can damage the components and lead to leaks.
- Seek Professional Help if Needed: If you're unsure about any aspect of the installation process, seek professional help. A qualified technician can ensure a proper installation and provide you with valuable advice.
Conclusion and Call to Action
As a leading [Your Company Type] specializing in a diverse range of solutions, we understand the critical role that proper installation plays in the performance of hydraulic and pneumatic systems. Whether you're involved in industrial manufacturing, automotive operations, or any other field that relies on fluid and gas transfer, our expertise in Hydraulic Hose Assembly and Pneumatic Quick Coupling can provide you with the reliable components you need.
If you're facing challenges with hose nipple installations or are in the market for high-quality hose assemblies, don't hesitate to reach out. Our team of experts is ready to assist you in selecting the right products, offering guidance on installation best practices, and ensuring that your systems operate at peak efficiency. Contact us today to discuss your specific requirements and take the first step towards enhancing the reliability and performance of your operations.
References
- Parker Hannifin Corporation. "Hose Fittings and Couplings Installation Guide."
- Eaton Corporation. "Fluid Conveyance Installation and Maintenance Manual."
- Gates Corporation. "Hose Assembly Installation and Maintenance Instructions."