How to Install Tube Fittings
Tube fittings are essential components in various fluid handling systems, including hydraulic, pneumatic, and process piping systems. As a tube fitting supplier, I understand the importance of proper installation to ensure the reliable and efficient operation of these systems. In this blog post, I will guide you through the step-by-step process of installing tube fittings, covering the necessary tools, preparation, and installation techniques.
Tools and Materials Required
Before you start the installation process, it's important to gather all the necessary tools and materials. Here's a list of items you'll typically need:
- Tube cutter: A tube cutter is used to cut the tube to the required length. Make sure to choose a cutter that is suitable for the type and size of the tube you're working with.
- Deburring tool: After cutting the tube, you'll need to remove any burrs or sharp edges using a deburring tool. This helps prevent damage to the fitting and ensures a proper seal.
- Wrenches: Depending on the type of fitting, you may need different types of wrenches to tighten the connections. Common wrenches include adjustable wrenches, socket wrenches, and flare nut wrenches.
- Sealant: In some cases, you may need to use a sealant to prevent leaks. Choose a sealant that is compatible with the fluid and operating conditions of your system.
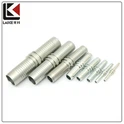
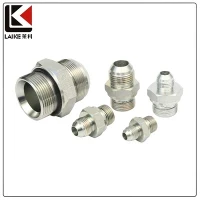
- Tube fittings: Of course, you'll need the appropriate tube fittings for your application. Make sure to select fittings that are compatible with the tube size, material, and pressure rating of your system. Some popular types of tube fittings include Kumatsu Adapter, JIC To JIC Adapter, and SAE Flange Adapter.
Preparation
Once you have all the necessary tools and materials, it's time to prepare the tube and fittings for installation. Here are the steps to follow:
- Cut the tube: Use a tube cutter to cut the tube to the required length. Make sure to measure the tube accurately and mark the cutting point before making the cut. When cutting the tube, apply steady pressure and rotate the cutter around the tube until it cuts through.
- Deburr the tube: After cutting the tube, use a deburring tool to remove any burrs or sharp edges from the inside and outside of the tube. This helps prevent damage to the fitting and ensures a proper seal.
- Clean the tube and fittings: Before installing the fittings, make sure to clean the tube and fittings thoroughly to remove any dirt, debris, or oil. You can use a clean cloth or a solvent to clean the surfaces.
- Inspect the tube and fittings: Inspect the tube and fittings for any damage or defects. Make sure that the tube is straight and free of any cracks or dents, and that the fittings are in good condition and have no signs of damage.
Installation
Now that the tube and fittings are prepared, it's time to install the fittings. Here are the general steps to follow:
- Insert the tube into the fitting: Insert the tube into the fitting until it reaches the bottom of the fitting. Make sure that the tube is inserted straight and that there is no gap between the tube and the fitting.
- Tighten the fitting: Use the appropriate wrench to tighten the fitting onto the tube. Make sure to tighten the fitting evenly and to the recommended torque specification. Over-tightening the fitting can damage the fitting or the tube, while under-tightening can cause leaks.
- Check for leaks: After tightening the fitting, check for leaks by applying pressure to the system. You can use a pressure gauge or a leak detector to check for leaks. If you find a leak, loosen the fitting slightly and re-tighten it until the leak stops.
- Repeat the process: Repeat the above steps for each fitting that you need to install. Make sure to follow the same installation procedure for each fitting to ensure a consistent and reliable installation.
Tips and Tricks
Here are some tips and tricks to help you install tube fittings correctly:


- Use the right tools: Make sure to use the appropriate tools for the job. Using the wrong tools can damage the fitting or the tube, and can also make the installation process more difficult.
- Follow the manufacturer's instructions: Always follow the manufacturer's instructions for installing the fittings. The manufacturer's instructions will provide you with the recommended torque specification, installation procedure, and other important information.
- Use a sealant if necessary: In some cases, you may need to use a sealant to prevent leaks. Make sure to choose a sealant that is compatible with the fluid and operating conditions of your system, and follow the manufacturer's instructions for applying the sealant.
- Inspect the installation regularly: After installing the fittings, inspect the installation regularly to check for leaks or other problems. Make sure to tighten the fittings if necessary, and to replace any damaged or worn-out fittings.
Conclusion
Installing tube fittings correctly is essential for the reliable and efficient operation of fluid handling systems. By following the steps outlined in this blog post and using the right tools and materials, you can ensure a proper installation and prevent leaks and other problems. If you have any questions or need further assistance with installing tube fittings, please don't hesitate to contact us. We are a leading tube fitting supplier and can provide you with the products and support you need to get the job done right.
References
- Fluid Power Handbook, edited by Ronald K. Jurgen
- Hydraulic and Pneumatic Systems: Design and Application, by Joseph A. Scheidler
- Tube Fittings Installation Guide, published by the tube fitting manufacturer