As a leading supplier of SAE Flange Adapters, I understand the importance of proper maintenance and replacement of components to ensure the optimal performance of hydraulic systems. One crucial aspect of maintaining an SAE flange adapter is replacing the seal when necessary. In this blog post, I will guide you through the process of replacing the seal of an SAE flange adapter, providing you with step-by-step instructions and valuable tips along the way.
Understanding the Importance of Seals in SAE Flange Adapters
Before we delve into the replacement process, let's first understand why seals are so important in SAE flange adapters. Seals play a critical role in preventing fluid leakage and maintaining the integrity of the hydraulic system. They create a barrier between the different components of the adapter, ensuring that hydraulic fluid flows smoothly and efficiently. Over time, however, seals can wear out due to factors such as pressure, temperature, and chemical exposure. When a seal fails, it can lead to fluid leakage, which not only wastes valuable resources but also poses a safety hazard. Therefore, regular inspection and replacement of seals are essential to keep your hydraulic system running smoothly.
Tools and Materials You Will Need
Before you begin the seal replacement process, it's important to gather all the necessary tools and materials. Here's a list of what you'll need:
- New seal: Make sure to choose a seal that is compatible with your SAE flange adapter. You can refer to the adapter's specifications or consult with a professional to ensure you select the right seal.
- Wrenches: You'll need a set of wrenches to loosen and tighten the bolts on the flange adapter.
- Socket set: A socket set will come in handy for removing and installing the bolts.
- Sealant: Depending on the type of seal and the application, you may need to use a sealant to ensure a proper seal.
- Cleaning supplies: You'll need a clean cloth and a suitable cleaning solution to clean the adapter and remove any dirt or debris.
- Safety equipment: It's important to wear safety glasses and gloves to protect yourself from any potential hazards.
Step-by-Step Guide to Replacing the Seal
Now that you have all the necessary tools and materials, let's walk through the process of replacing the seal of an SAE flange adapter:
Step 1: Prepare the Work Area
Before you start working on the adapter, make sure to prepare a clean and well-lit work area. Remove any obstacles or debris that could interfere with the replacement process. It's also a good idea to lay down a clean cloth or mat to protect the adapter and prevent any scratches.
Step 2: Drain the Hydraulic System
Before you remove the adapter, you'll need to drain the hydraulic system to prevent any fluid from leaking out. Locate the drain valve or plug on the system and open it to allow the fluid to drain into a suitable container. Make sure to follow all safety precautions when working with hydraulic fluid, as it can be hazardous if not handled properly.
Step 3: Remove the Flange Adapter
Once the hydraulic system is drained, you can proceed to remove the flange adapter. Use a wrench or socket set to loosen the bolts on the adapter. Make sure to keep track of the bolts and washers, as you'll need to reinstall them later. Once the bolts are loose, carefully remove the adapter from the hydraulic system.
Step 4: Remove the Old Seal
With the adapter removed, you can now access the old seal. Use a flathead screwdriver or a seal removal tool to carefully pry the old seal out of the adapter. Be careful not to damage the adapter or the surrounding components while removing the seal. Once the old seal is removed, clean the seal groove thoroughly to remove any dirt or debris.
Step 5: Clean the Adapter
After removing the old seal, it's important to clean the adapter to ensure a proper seal. Use a clean cloth and a suitable cleaning solution to wipe down the adapter and remove any dirt, oil, or debris. Pay special attention to the seal groove and the mating surfaces of the adapter. Make sure the adapter is completely dry before proceeding to the next step.
Step 6: Install the New Seal
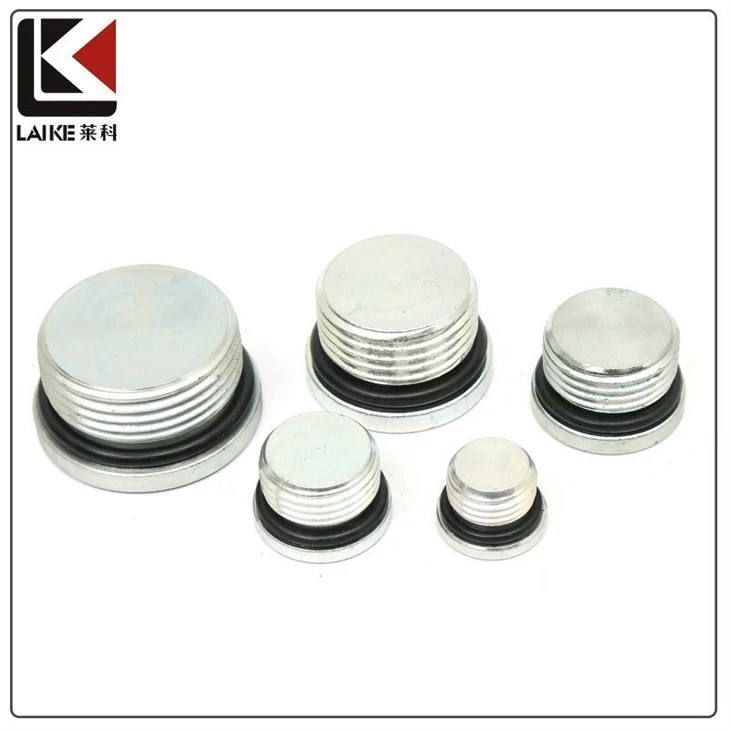
Once the adapter is clean and dry, you can install the new seal. Apply a thin layer of sealant to the seal groove if recommended by the manufacturer. Carefully place the new seal into the groove, making sure it is properly seated and aligned. Use a seal installation tool or a flathead screwdriver to gently press the seal into place. Make sure the seal is not twisted or damaged during installation.

Step 7: Reinstall the Flange Adapter
With the new seal installed, you can now reinstall the flange adapter. Carefully align the adapter with the hydraulic system and insert the bolts. Use a wrench or socket set to tighten the bolts evenly, making sure not to over-tighten them. Follow the manufacturer's specifications for the proper torque settings.
Step 8: Refill the Hydraulic System
Once the adapter is reinstalled, you can refill the hydraulic system with the appropriate fluid. Make sure to use the correct type and grade of fluid recommended by the manufacturer. Slowly add the fluid to the system, allowing it to fill the reservoir and circulate through the system. Check for any leaks or abnormal noises during the filling process.
Step 9: Test the Hydraulic System
After refilling the hydraulic system, it's important to test the system to ensure it is working properly. Start the hydraulic system and check for any leaks or abnormal pressures. Monitor the system for a few minutes to make sure everything is functioning as expected. If you notice any issues, stop the system immediately and troubleshoot the problem.
Tips and Best Practices
Here are some additional tips and best practices to keep in mind when replacing the seal of an SAE flange adapter:
- Inspect the Adapter Regularly: Regular inspection of the adapter and the seals is essential to detect any signs of wear or damage early on. This can help prevent costly repairs and downtime.
- Use High-Quality Seals: Investing in high-quality seals is crucial to ensure the long-term performance and reliability of the hydraulic system. Cheap or low-quality seals may not provide a proper seal and can lead to leaks and other issues.
- Follow the Manufacturer's Instructions: Always follow the manufacturer's instructions and specifications when replacing the seal. This includes using the correct tools, sealant, and torque settings.
- Keep Spare Seals on Hand: It's a good idea to keep a supply of spare seals on hand in case of an emergency. This can help minimize downtime and ensure that you can quickly replace a worn or damaged seal.
- Seek Professional Help if Needed: If you're unsure about any aspect of the seal replacement process or if you encounter any difficulties, don't hesitate to seek professional help. A qualified hydraulic technician can provide you with the expertise and guidance you need to ensure a successful seal replacement.
Conclusion
Replacing the seal of an SAE flange adapter is a relatively straightforward process that can be completed with the right tools and knowledge. By following the step-by-step instructions outlined in this blog post and keeping the tips and best practices in mind, you can ensure the proper maintenance and performance of your hydraulic system. Remember, regular inspection and replacement of seals are essential to prevent fluid leakage and maintain the integrity of the system. If you have any questions or need further assistance, please don't hesitate to contact us. We're here to help you keep your hydraulic system running smoothly.
If you're in the market for high-quality SAE flange adapters, NPTF Adapter, Kumatsu Adapter, or Hydraulic Plugs and Caps, we invite you to explore our extensive product range. Our team of experts is ready to assist you with your procurement needs and provide you with the best solutions for your hydraulic system. Contact us today to start the procurement discussion and take your hydraulic system to the next level.
References
- Manufacturer's manuals and specifications for SAE flange adapters
- Hydraulic system maintenance guides
- Industry best practices for seal replacement in hydraulic systems