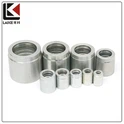
As a seasoned supplier of hydraulic fittings, I've witnessed firsthand the importance of proper installation when it comes to hydraulic systems. A well - installed hydraulic fitting on a hydraulic motor not only ensures the efficient operation of the motor but also extends its lifespan and reduces the risk of costly breakdowns. In this blog post, I'll share a step - by - step guide on how to install hydraulic fittings on a hydraulic motor.
Step 1: Gather the Necessary Tools and Materials
Before you start the installation process, it's crucial to have all the required tools and materials at hand. You'll need a set of wrenches, which should match the size of the fittings. A torque wrench is also essential to ensure that the fittings are tightened to the correct specifications. Additionally, you'll need a sealant or O - rings, depending on the type of fitting. As a hydraulic fitting supplier, I can offer a wide range of high - quality JIC Adaptor, Swivel Hose Fitting, and Adapter Hydraulic that are suitable for various hydraulic motor applications.
Step 2: Prepare the Hydraulic Motor
The first step in preparing the hydraulic motor is to clean the connection points thoroughly. Any dirt, debris, or old sealant can prevent a proper seal and lead to leaks. Use a clean, lint - free cloth and a suitable cleaning solvent to wipe down the ports on the hydraulic motor. Make sure to remove any burrs or sharp edges around the ports, as these can damage the seals and fittings.
Step 3: Select the Right Fittings
Choosing the correct fittings is of utmost importance. The fittings should be compatible with the hydraulic motor in terms of size, thread type, and pressure rating. For example, if your hydraulic motor has a specific thread size, you need to select fittings with the same thread size. As a supplier, I can assist you in making the right choice based on your motor's specifications. Different types of fittings, such as JIC Adaptor, are designed for specific applications. JIC adaptors are commonly used in high - pressure hydraulic systems due to their excellent sealing properties.
Step 4: Apply Sealant or Install O - rings
Depending on the type of fitting, you may need to apply a sealant or install O - rings. If using a sealant, apply a thin, even layer to the threads of the fitting. Be careful not to over - apply the sealant, as it can enter the hydraulic system and cause blockages. For O - rings, make sure they are the correct size and are installed properly. Check for any signs of damage or wear on the O - rings before installation.
Step 5: Install the Fittings
Now it's time to install the fittings onto the hydraulic motor. Carefully thread the fitting into the port on the motor by hand. This will help ensure that the threads start correctly and prevent cross - threading. Once the fitting is hand - tight, use a wrench to tighten it further. However, it's important not to overtighten the fitting, as this can damage the threads and the motor. Use a torque wrench to achieve the recommended torque value for the specific fitting. The torque value can usually be found in the manufacturer's specifications.
Step 6: Connect the Hoses or Tubing
After installing the fittings on the hydraulic motor, you can connect the hoses or tubing. Make sure the hoses or tubing are the correct size and are in good condition. Similar to fitting installation, start by hand - tightening the connections and then use a wrench to achieve the proper tightness. Check for any signs of leaks around the connections.
Step 7: Pressure Test the System
Once all the fittings and connections are in place, it's essential to perform a pressure test on the hydraulic system. This will help identify any potential leaks or issues before the system is put into full operation. Gradually increase the pressure in the system and carefully inspect all the connections for leaks. If you notice any leaks, shut down the system immediately and tighten the fittings or replace the seals as necessary.
Step 8: Regular Maintenance and Inspection
After the installation and pressure test, regular maintenance and inspection are crucial. Check the fittings and connections periodically for signs of wear, damage, or leaks. Over time, vibrations and pressure changes can cause the fittings to loosen. Make sure to retighten the fittings if necessary and replace any worn - out seals or O - rings.
Conclusion
Installing hydraulic fittings on a hydraulic motor is a task that requires attention to detail and the right tools. By following these steps, you can ensure a proper installation that will result in a reliable and efficient hydraulic system. As a hydraulic fitting supplier, I'm committed to providing high - quality products and expert advice to help you with your hydraulic system needs.


If you're in the market for hydraulic fittings or need further guidance on installation, don't hesitate to contact us. We're here to assist you in finding the perfect solutions for your hydraulic motor applications.
References
- "Hydraulic System Installation and Maintenance Guide", Industry Standards Publication
- Manufacturer's Manuals for Hydraulic Motors and Fittings